
 |
| Why the rain? Ben asked me to go out with him in the rain and proposed in the rain! |
~I Cor. 13:4
This is sort of a follow-up to the blog post I did," answering question one". Another question we get asked a lot is how do we find the time to be alone and do things together. It's true that with little ones finding extra time for each other is challenging. And it's a challenge whether you have one or you have 10. Whether it's the challenge of being able to find child care, affording to go out, finding the time in your busy schedule or even the challenge of having your spouse gone for lengths of time like our military families face. It is hard for most couples to find time to be together.
For Ben and I our biggest challenge is child care. We do not have family near us that we can ask. Finding a babysitter who is able and willing to watch five young children is also not easy. The thought of watching 5 kids is overwhelming to most we have discovered. Thankfully we have one girl who comes from a large family and does a fantastic job handling the kids-when she's available. She has a job and a busy life so she's not always available. We are also blessed with some amazing friends who have offered to watch the kids from time to time so Ben and I can get out-for that I am very grateful! It is so important for couples to make time for each other. Sometimes, you just have to get the idea of a "perfect night" out of your head and get creative. It can be very disappointing when you have an idea in your mind of what you think would be the most fun or most romantic only to have those dreams squashed because of life's circumstances. I have learned to just go with the flow, and think outside the box! For those of you who find yourselves in similar situations as us, here are some ideas.
1. Date Night In! I know it doesn't sound as exciting but when babysitters are not readily available this is a great alternative. We usually splurge on what we'll eat that night (since we're saving money not using babysitter) but it can be as simple as grilled cheese and soup. We put the kids to bed early (I keep the younger ones up all day and skip naps so they are ready for bed early) and then we start our date. There have been times we've even gotten dressed up like we're going out. This has been, for us, an excellent alternative to going out. And most times, we enjoy it more than if we had gotten a babysitter and gone out. Get a movie to watch after the meal or plan to play a game you both like but never have time to play- purpose to do something together and make it fun!
2. Turn your room into Paradise! This idea I got from a blog post I had read a couple years ago. I don't know about you but we can barely get someone to watch the kids for a few hours let alone a whole week so we can go on vacation. The last time Ben and I had no kids for a whole week was when his parents had Noah, Owen and Gabe so I could deliver Will. Not exactly paradise. Last Valentine's Day I asked Ben what his idea of a romantic getaway would be. He said camping. I like camping, but it doesn't say "romance" to me. The difference between men and women I guess. But if that was his idea of paradise then I was going to make it happen. So I turned our basement playroom into a camp site. I set up our tent inside and got out our sleeping bags. I bought yankee candle air fresheners in Pine scent to make it smell "outdoorsy". I found recipes online that could be made on a campfire in cast iron. Our stove is propane so it's kinda like a campfire-kinda! I had flashlights and lanterns all powered up and a deck of cards & cribbage board. When I was all done all I could think was, "really? this is his idea of romantic?". But he loved it and was really appreciative of the thought and effort. And I had fun doing it for him.
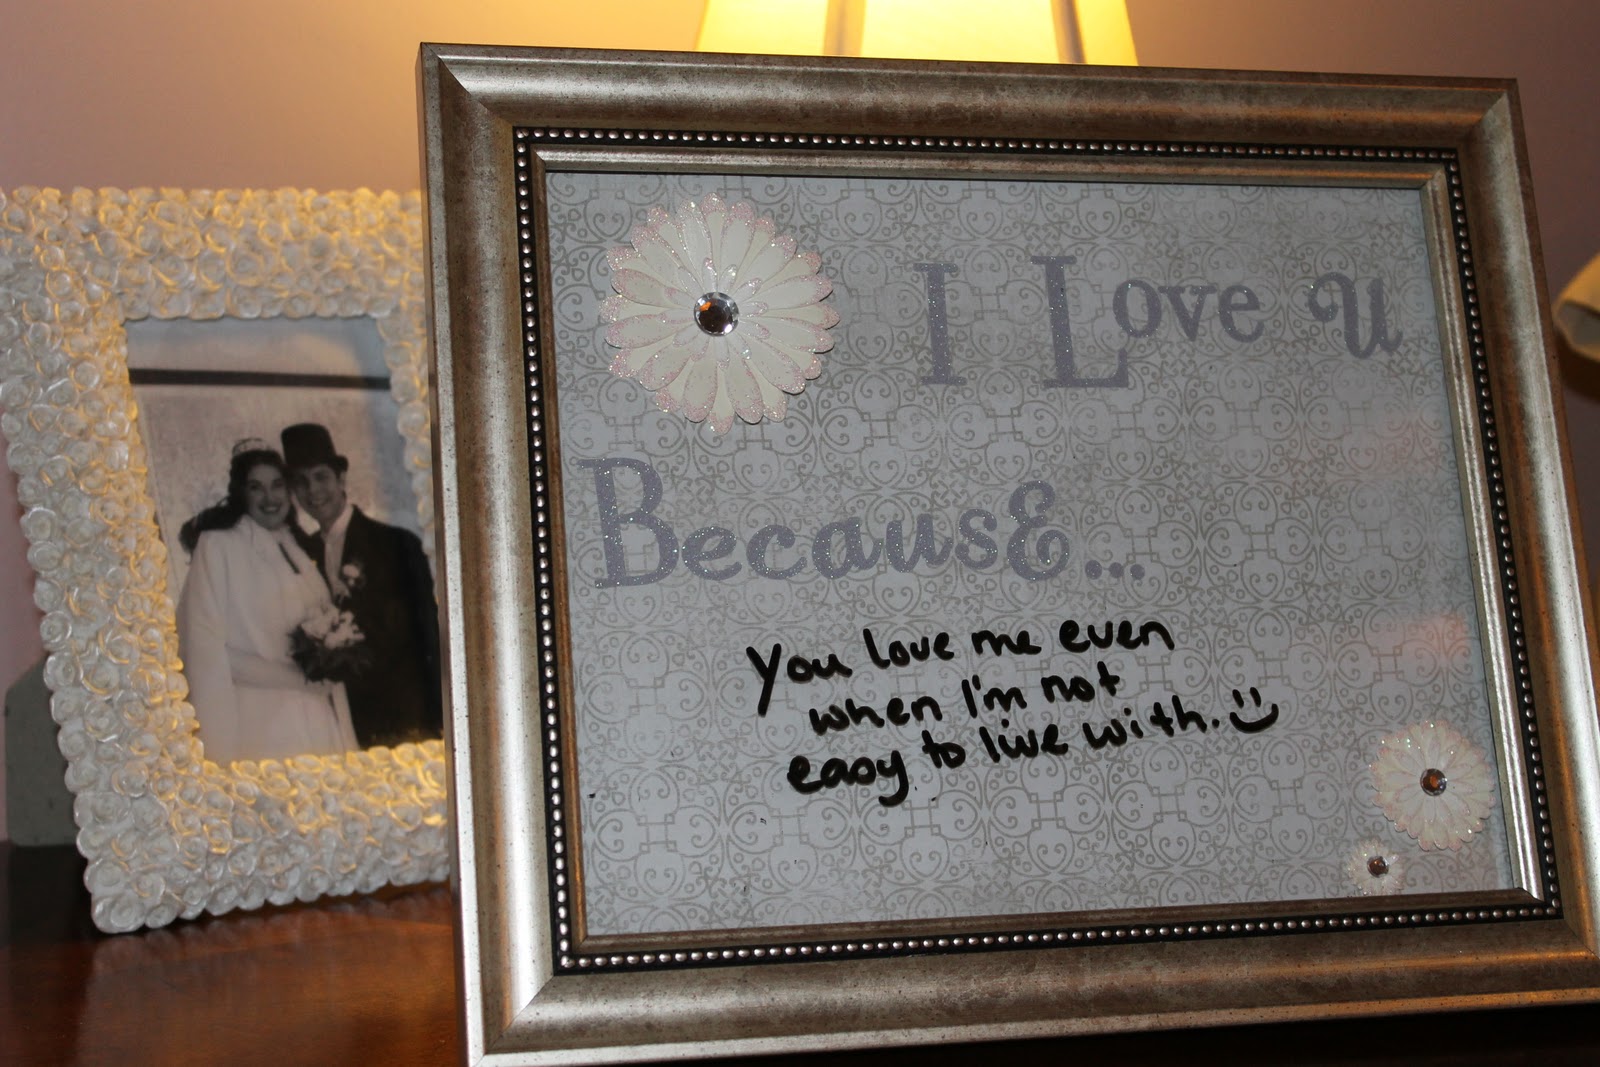
3. Get creative in how you communicate. I never understood it when couples would say, "I haven't had time to talk to my spouse about that yet". When we had just the 2, maybe even 3, boys I felt like we always had time to talk. It hasn't been until maybe the past couple of years that I feel like we hardly have time to have a conversation. I mean sure, we talk about the day to day stuff like, "you'll have to get the kids at school today..." or "can you pick up some milk on your way home" but as far as a real conversation it's very challenging. I am usually fighting with the kids for his attention, and vice versa. Plus now that two are in school and they have more activities and with Ben and I having more responsibilities as of late, there isn't a lot of time for talking. And I think this affects me more than him-actually I KNOW it does! You can leave notes for each other around the house, in a place they won't expect it. Ben makes an effort to call me at least once a day to check in and see how I'm doing. This means the world to me! I saw this idea on Pinterest (seriously if you're not on it yet, you should be!) and fell in love with it. It's such a great idea. Here's the one I made:
 It was so easy. Buy a frame (or use one you already have), get some scrapbook paper, write the words "I love you (or "U") because..." in your own handwriting, with a printer or with stickers like I did and embellish it if you want. Voila! Then get a dry or wet erase marker and write a message like this:
 You write your message right on the glass and erase it when you want to write a new one. Take turns.I gave this to Ben recently because he's been working late every night, last night it was 9pm before I saw him. It's a fun way to remind each other what it is we love about each other...and it's quick! It was meant to be a Valentine's Day gift but he's traveling for 2 weeks for work starting on Sunday and won't be here for Valentine's Day. I think this is just the coolest idea for a gift because seriously, after 12 years of being together, I'm starting to run out of creative, thoughtful, romantic gift ideas!.
Those have been some fixes to some of the challenges we face and it has really helped us stay connected. If you have any ideas of your own that have worked for you, please share!
This is sort of a follow-up to the blog post I did," answering question one". Another question we get asked a lot is how do we find the time to be alone and do things together. It's true that with little ones finding extra time for each other is challenging. And it's a challenge whether you have one or you have 10. Whether it's the challenge of being able to find child care, affording to go out, finding the time in your busy schedule or even the challenge of having your spouse gone for lengths of time like our military families face. It is hard for most couples to find time to be together.
For Ben and I our biggest challenge is child care. We do not have family near us that we can ask. Finding a babysitter who is able and willing to watch five young children is also not easy. The thought of watching 5 kids is overwhelming to most we have discovered. Thankfully we have one girl who comes from a large family and does a fantastic job handling the kids-when she's available. She has a job and a busy life so she's not always available. We are also blessed with some amazing friends who have offered to watch the kids from time to time so Ben and I can get out-for that I am very grateful! It is so important for couples to make time for each other. Sometimes, you just have to get the idea of a "perfect night" out of your head and get creative. It can be very disappointing when you have an idea in your mind of what you think would be the most fun or most romantic only to have those dreams squashed because of life's circumstances. I have learned to just go with the flow, and think outside the box! For those of you who find yourselves in similar situations as us, here are some ideas.
1. Date Night In! I know it doesn't sound as exciting but when babysitters are not readily available this is a great alternative. We usually splurge on what we'll eat that night (since we're saving money not using babysitter) but it can be as simple as grilled cheese and soup. We put the kids to bed early (I keep the younger ones up all day and skip naps so they are ready for bed early) and then we start our date. There have been times we've even gotten dressed up like we're going out. This has been, for us, an excellent alternative to going out. And most times, we enjoy it more than if we had gotten a babysitter and gone out. Get a movie to watch after the meal or plan to play a game you both like but never have time to play- purpose to do something together and make it fun!
2. Turn your room into Paradise! This idea I got from a blog post I had read a couple years ago. I don't know about you but we can barely get someone to watch the kids for a few hours let alone a whole week so we can go on vacation. The last time Ben and I had no kids for a whole week was when his parents had Noah, Owen and Gabe so I could deliver Will. Not exactly paradise. Last Valentine's Day I asked Ben what his idea of a romantic getaway would be. He said camping. I like camping, but it doesn't say "romance" to me. The difference between men and women I guess. But if that was his idea of paradise then I was going to make it happen. So I turned our basement playroom into a camp site. I set up our tent inside and got out our sleeping bags. I bought yankee candle air fresheners in Pine scent to make it smell "outdoorsy". I found recipes online that could be made on a campfire in cast iron. Our stove is propane so it's kinda like a campfire-kinda! I had flashlights and lanterns all powered up and a deck of cards & cribbage board. When I was all done all I could think was, "really? this is his idea of romantic?". But he loved it and was really appreciative of the thought and effort. And I had fun doing it for him.
3. Get creative in how you communicate. I never understood it when couples would say, "I haven't had time to talk to my spouse about that yet". When we had just the 2, maybe even 3, boys I felt like we always had time to talk. It hasn't been until maybe the past couple of years that I feel like we hardly have time to have a conversation. I mean sure, we talk about the day to day stuff like, "you'll have to get the kids at school today..." or "can you pick up some milk on your way home" but as far as a real conversation it's very challenging. I am usually fighting with the kids for his attention, and vice versa. Plus now that two are in school and they have more activities and with Ben and I having more responsibilities as of late, there isn't a lot of time for talking. And I think this affects me more than him-actually I KNOW it does! You can leave notes for each other around the house, in a place they won't expect it. Ben makes an effort to call me at least once a day to check in and see how I'm doing. This means the world to me! I saw this idea on Pinterest (seriously if you're not on it yet, you should be!) and fell in love with it. It's such a great idea. Here's the one I made:

Those have been some fixes to some of the challenges we face and it has really helped us stay connected. If you have any ideas of your own that have worked for you, please share!

.JPG)


